Showing posts with label review. Show all posts

Sunday, February 17, 2013

Think Tank Street Walker - Review

Hey guys! Today i decided to give something new a try. I decided to go ahead and make a video review! Ill also include my written review below. Keep reading to find out how to get free gear from Think Tank! Check out my video review here:
(bare with me, this is my first video review and first video editing. if i sound like im mumbling a little thats because my wisdom teeth are coming in and i cant move my mouth :( sorry.)

ThinkTank StreetWalker - $160
This, as you can see, is the Think Tank Street Walker backpack camera bag.
Designed for use in urban and crowded environments, this slim, lightweight backpack is sized as an international carry-on. It holds a DSLR and a 70-200 2.8 with hood attached and multiple DSLR cameras and lenses.

I dont have a ton of stuff yet, but this bag hold everything I need with plenty of room to fill as my collection grows.

The bag has a small pocket on the front, and straps included to carry a tripod.
The back and straps on this bag are unbelievably comfortable, very thick padding, and an airflow channel with breathable mesh liners to keep your back cool while wearing the backpack.
The whole bag is water resistant, but also comes with a removable seam sealed rain cover.
There are two zipper pockets on either side, and two stretch pockets on top of that, great for keeping snacks and water bottles for day trips or hikes. I have found, though, when you have stuff in the zipper pocket, water bottles might not fit, or fit tightly in the stretch pocket, so watch what you put in there.
The straps have D rings, shoulder harness pockets, and a sternum strap. And is compatible with camera support straps (sold separately)
On top of the bag there is a clear business card holder for quick identification.
The zipper on the outside fits together with a hole for a lock (lock not included)

There is front pocket with pen slots, mesh pocket, and zippered pocket. This pocket is great for holding memory cards, lenspens, and other little accessories.
On the inside of the bag there are two clear pockets, where I keep my spare batteries and cords.
The inside of this bag is super roomy. Theres a bunch of little dividers you can insert where ever you need to fit whatever equipment youre taking with you.
Plenty of room inside for multiple cameras and/or lenses, as well as other accessories such as flashes, battery packs, chargers, timer remotes, filters, etc.

Ive used a few different camera bags. Different brands, different price ranges, and different styles. This is by far my favorite Ive used so far. They say its great for urban environments, but I think its great for any environment for everybody - beginner to pro. I love this bag and suggest everyone go check it out!

There are two other bags in the StreetWalker line:
StreetWalker Pro - fits most 400 f2.8 lenses with pro size DSLR body attaches. Also fits a standard kit of smaller lenses and accessories. - $190
StreetWalker HardDrive - Fits DSLR and a 70-200 2.8 with hood attaches and 15" laptop. - $220

Also, with every purchase $50 or more at ThinkTankPhoto.com you get free gear! Click here to find out how!


Disclaimer: Photos: ThinkTankPhoto.com Video by me! Think Tank provided me with this product for the purpose of writing a review. This in no way effects the quality of the review provided. All opinions are my own. No monetary exchange occurred in exchange for this post or review. The views expressed in this review are strictly my own opinions. All reviews provided here are the work of myself and remain completely unbiased.

Monday, January 21, 2013

Timer Remote Review.

Timer remotes are extremely helpful in so many ways. Theyre similar to cable releases, but in my opinion better. They have more uses.. A cable release is simply a shutter release button on a cord so you can press the button without having to touch your camera which can cause shake, messing up your photo. You can press and hold (while on bulb mode) for long exposures.
The timer remote also has this feature. Plus it can be pressed in and slid up to hold the button in so you dont have to manually hold it for extended periods of time. Plus you can set it to take pictures at set increments, which is great for timelapse photography.

Its been over a year since I got my timer remote, so I cant find the exact one that I got, but this is the closest I could find. It looks exactly the same, so Im sure it works the same.
You can find many different timer remotes at all different prices. I got mine for around $15. But you can find
them for as cheap as $5 or the most expensive Ive seen is $300.
I got mine on Amazon.com, and you can find really good ones on BHPhotovideo.com or Adorama.com.
You wanna make sure when youre shopping for one that youre getting one that has all the options you want. Read the reviews and specifications. Mine can be set to infinity, but some are limited to 99 hours. (not like that would really be a problem though, how many people would need to go longer?)
Make sure your cord is nice and long. If its too short you could accidentally move your camera, which can really mess up your picture. And make sure it has the right connection. My camera uses a Sub-mini connection, but some use a 3-pin connection. So be sure to check that before you buy.
Another thing to take note on is battery and on/off switch. Mine doesnt have an on/off switch. It takes 2 AAA batteries. Since it doesnt have an on/off switch I just remove the batteries when Im not using it, which isnt a big deal to me, but if it is for you check to make sure it has one. 
Read your manuel to figure out how to set it to take pictures at set intervals, theyre all pretty much the same, but setting it might be different. And Im not gonna lie, it took me a while to figure out how to set mine. Just mess with it until you get the hang of it before you try to take it out for a serious shoot.

I love my timer remote, and I use it all the time. Ive used the timer part only about 2 or 3 times. But I use the shutter release button all the time. Its one of my most used accessories, and I recommend it for EVERYONE into photography. At only around $15 theres really not much reason to not buy it. 

Here is my first (test) timelapse video using the timer remote:
Heres a few examples of pictures Ive taken using my timer remote:

Keep on shooting :)

Disclaimer: All photos are mine, unless otherwise stated. All opinions are my own. No monetary exchange occurred in exchange for this post or review. All items mentioned in this review were purchased by me, for my own personal use, and not for review purposes. I am simply sharing my opinions.

Friday, January 4, 2013

iPhoneography

iPhoneography has become a huge sensation recently.. iPhone camera quality has improved soo much, and the quality of the images is unbelievable ..looking back at old flip phones and even old digital cameras, the iPhone 4/4S & 5 cameras puts them all to shame. 
So heres a few products that I think might improve your iPhoneography :)

Tripods are one of the most important things when it comes to photography, theres nothing worse than a blurry image because you cant hold the camera still..well the same goes with iPhoneography, sometimes when youre trying to get the perfect shot, it just doesnt work, because while youre taking the picture you move ever so slightly, and it completely ruins the image. So a little solution is this:

A great, folding tabletop stand for your iPhone 4/4S (3GS model also available). Great for HD Videos, watching movies on iTunes, or Facetime. The iPhone mount can be removed so you can use your iPhone on any tripod. The FlipCage can also hold your favorite point-and-shoot camera.

This is a pretty cool idea, but I think the design needs a little work..
It was really hard to slide my phone into the little clip thing, and pretty hard to remove too. I thought my phone was going to get stuck in there. But after putting it on and off a few times, it seems to have loosened up a little..
It has this annoying little strapy thing on it, which I cant figure out how to remove without cutting. It kind of gets in the way and tangles around the thing.
It has these two little white things that clip onto the bottom part, which Im honestly not sure what theyre for, and I dont see them explained anywhere.
The product itself seems a little cheesy, its made from plastic.
The packaging doesnt include any sort of instructions. I know the thing is pretty self explanatory, but some people still might need a little help.
Its really cool that you can take it off of the mount and use it on any tripod, and its awesome that you can use it for your point and shoot.

This is also available for the 3GS. You can buy it from GaryFongStore.com for around $40 (on sale now for $30)

Another option for iPhone tripods is the

This is another tripod option for you iPhone. It includes a really nice case for protection, two connectors (not sure why it comes with two though), and the xshot tripod. This one can also be used on any tripod, but unlike the flipcage this one can be used in either portrait or landscape. It can also be used on other xshot products such as the camera extender.

Again, a great idea. I actually like this one better than the flipcage, it has more functions, easier to use, and I think better quality. 
The case that comes with it seems to be really great quality, its thick enough to add great protection, but not so thick that its bulky. It has all the holes to leave your buttons and speakers open. It fits great. And its this kind of rubbery texture which has great grip. I really like this case..
Like I mentioned above, it has two little connectors. Im not sure why it comes with two, I think one would be fine. There are two connection options on the case, but you can really only use one at a time. But its always nice to have a backup, so thats a plus.
The tripod that comes with it is a flex mini tripod, reminds me a little of the Joby Gorillapod, which I was super excited about. But when I strated messing with it, its not at all like that. You cant bend the legs very much, you cant wrap them around stuff, and when your phones on there if theyre not sitting right, it will fall over. If they worked on the tripod a little I think it would be perfect.
But all together its a really great product. Really nice quality, and being able to use it on any tripod or other xshot prducts is super cool.

You can find this and other xshot products at xshot.com. Retails for about $35

So out of the two tripods, I prefer the xshot. I think its nicer, better quality, cool case, and cheaper.

And now for the most exciting part of this post :)
Your camera is nothing without your lenses, right?
So it makes sense to add lenses to your iPhone, right?
RIGHT!

The olloclip is a quick-connect lens solution for the iPhone that includes fisheye, wide-angle and macro lenses in one small, convenient package that easily fits in your pocket. Nestled in the palm of your hand, the olloclip connects to the iPhone within seconds so you’ll be sure to capture the image you want…if you don’t see the picture you’re looking for just flip it over to switch lenses.

Such an amazing idea! And such an amazing product!
The olloclip comes in three colors. White, black, and red. And in two "sizes" for the iPhone 4/4S and for the iPhone 5.
The 4/4S one can also be used with 4th generation ipods because they come with an adapter.
You can also buy replacement caps if you lose them..which im gonna have to do cuz my bad dog chewed up mine >:(
To use the olloclip its so easy you dont even have to think. All you do it slide it right over the corner where the camera is. It has a groove cut out so it doesnt press the lock button on top.
As you can see in the picture above, theres only two lenses on there. The Fisheye and the Wide angle. To use the macro lens you just unscrew the wideangle, and viola, the macro is underneath. Making it 3-in-1.
You can take some amazing, creative pictures with these lenses. I dont find myself using the fisheye very often, but its cool to have! The wideangle is super cool, I hate when theres a landscape you wanna capture, but you cant seem to fit it all in the picture. :( And the macro is so amazing! Just looking at your fingertips through it amazes me.
To use the macro, you have to move your phone closer or further from the subject, which an be a pain if you dont have something to rest your hand on it could be difficult to focus.
Here are a few examples of some pictures Ive taken using my macro lens.
 Water drop on the tip of a tiny leaf.
 My eyeball :P
And my puppies eye.
The details this lens picks up is pretty amazing for a cellphone image. 

I absolutely LOVE my olloclip, and I hope they continue to make them for iPhones for many years, cuz I will buy one every time I get a new phone! My new #1 must have for my phone! :)

You can buy your olloclip at olloclip.com $70 for either 4/4S or 5.

Disclaimer: Photos/videos are from products site. The products in this review were provided to me for the purpose of writing a review. This in no way effects the quality of the review provided. All opinions are my own. No monetary exchange occurred in exchange for this post or review. The views expressed in this review are strictly my own opinions. All reviews provided here are the work of myself and remain completely unbiased.

Friday, November 2, 2012

Lens Coat Review

LensCoat protects your gear rain or shine. Whether it be the elements, travel, or hazards of general use. LensCoat has you covered.


About LensCoat
LensCoat® Lens Covers are manufactured from 100% closed-cell neoprene, offering protection from bumps, jars and nicks, with a camouflage-pattern fabric cover. LensCoat® Lens Covers also provide a thermal barrier, protecting your hands from cold lenses in lower temperatures. They are easy to install and remove, sliding on like a sleeve, leaving no residue on the lens. And LensCoat® lens covers are waterproof, providing protection in harsh conditions.
Other features include a clear, flexible UV-PVC window over the AF/IS/VR controls and the distance-scale window. The LensCoat® also features custom holes that reveal the red-dot for easy alignment to the camera body without removing the cover.
LensCoat® Lens Covers are available for a wide variety of lenses and extenders. LensCoat® can also make CUSTOM COVERS.
LensCoat products are Made in America!
Thats such a huge plus! I would rather pay twice as much for a product made in the USA than support companies overseas, but fortunately these products are really well priced!


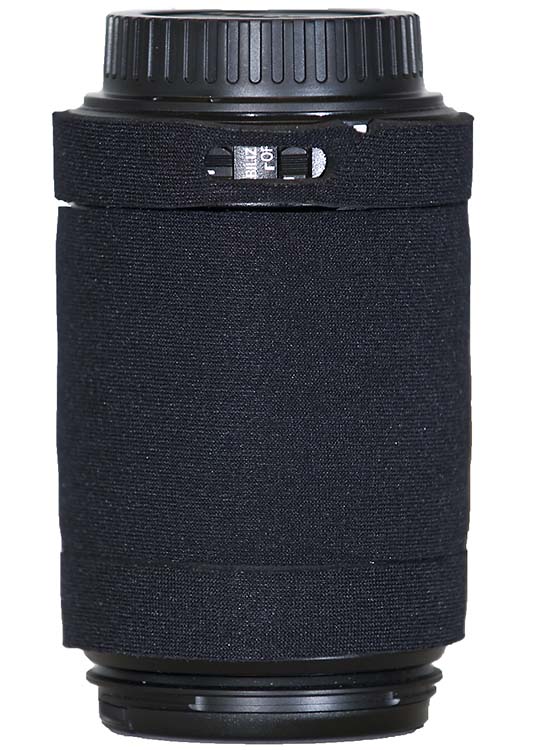
This is the LensCoat to fit on one of my lenses. It comes with instructions on how to put it on your lens. It fits perfectly, its soft and comfortable. They leave a little hole and notch for your AF and IS controls. (Be careful when putting it on not to stretch and tear your LensCoat)
The only problem Ive found with this product is when I put my lens in my camera bag it must have shifted the lenscoat, and when I took it out it had a little wrinkle in it where it was bent back. Also since this is a pretty small lens the two end pieces which are only about 3/4" so they can slip a little, but no biggie.
This product offers great protection and camouflage if you get it in camo. Great price! Id much rather spend $30 on this than risk having to spend another $300 on a new lens if it gets dinged up.
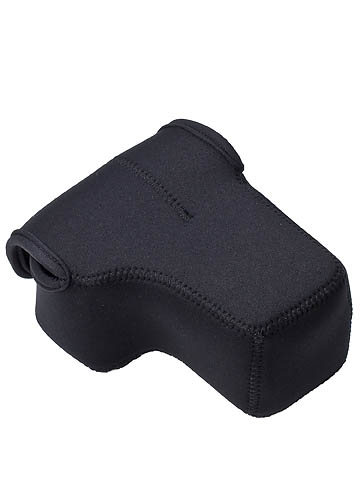
Made from the same material as the coats, the body bag fits your camera with a lens up to 4.5" attached. This offers the same great protection as the coat, but for your whole camera and lens. You camera slides right in easily, and the bag closes with velcro, no annoying buckles or zippers to get stuck.
I havent found any problems with this product.
This product is great for storage, travel, and everyday use. Great value, wouldnt you much rather spend less than $30 on a product designed to protect your camera and lens, than have to spend hundreds to thousands of dollars on a new one?

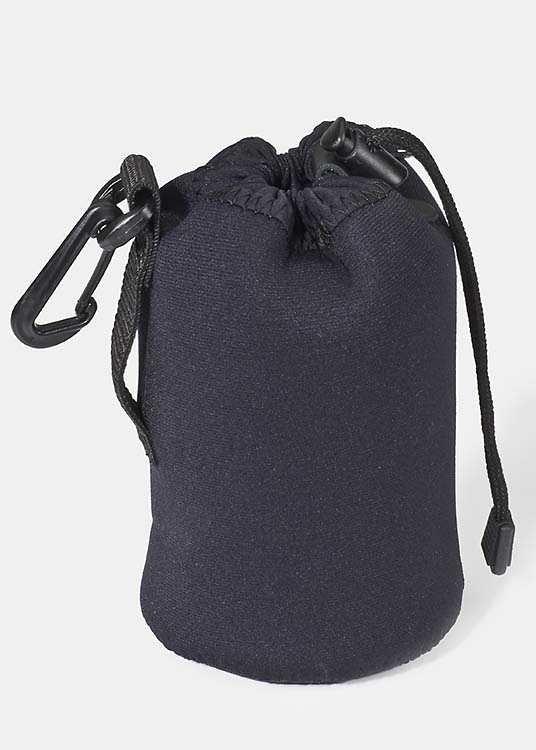
LensPouch Small/XSmall - Black - $16.00/$15.99
Also made from the neoprene, these are great products to store your lenses in for storage, travel, etc. 
I havent found any problems with this product.
Available in seven different sizes for the perfect fit. The LensPouch includes a removable reinforced front element protection disc for your lenses. An easy pull cord closure allows fast and easy access. A convenient 1" belt loop allows you to connect your LensPouch to a belt or to a belt system; the bag also includes a heavy duty snap hood to clip onto your belt, jacket, or camera bag. Flattens and compacts when empty for easy storage.

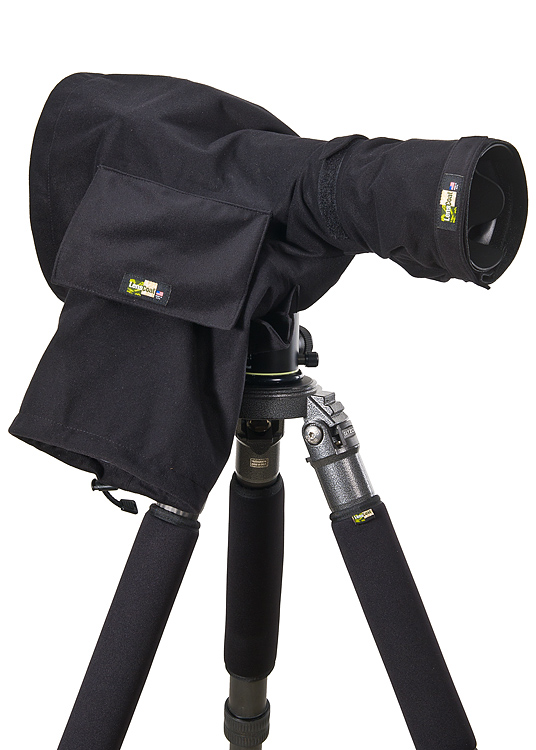
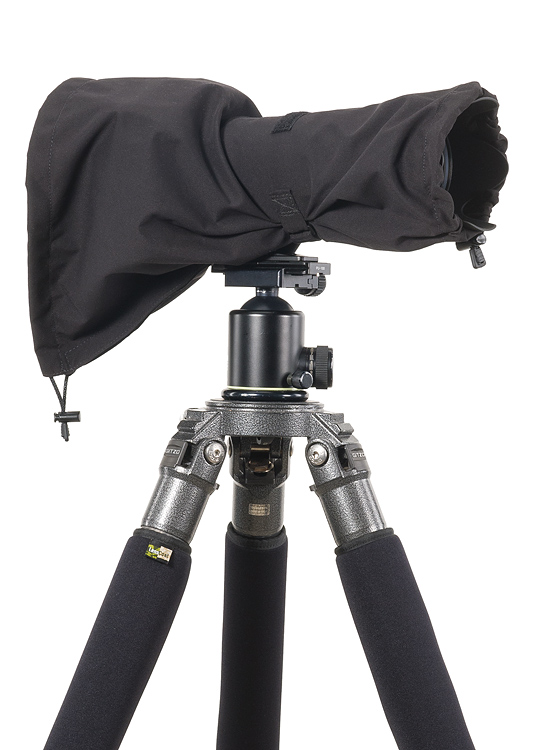
LensCoat® RainCoat Standard/Medium - Black - $79.99/$59.99

LensCoat® RainCoat Rain Sleeve provides protection for your camera and lens from the elements like rain, snow, salt spray, dirt, sand and dust while allowing you easy access to the camera and lens controls. 
They Standard (left) was a little confusing when I first opened it, the little arm hole was on the inside, so I had to pu ll it out before I figured it out. Your camera should be on a tripod to put this on, otherwise it might be a little difficult. But when its on a tripod it slips on fast and easy. Its a great product to keep in your camera bag for those "out of the blue" moments when you need to cover your camera fast. It also comes in very handy when shooting at beaches, with sea spray and such.
The RainCoat RS comes in three sizes Small (for camera body and lens up to 10") and Medium (for camera body and lens up to 15") and Large (for camera body and lens up to 21"). The RainCoat is constructed from a lightweight waterproof, breathable material.
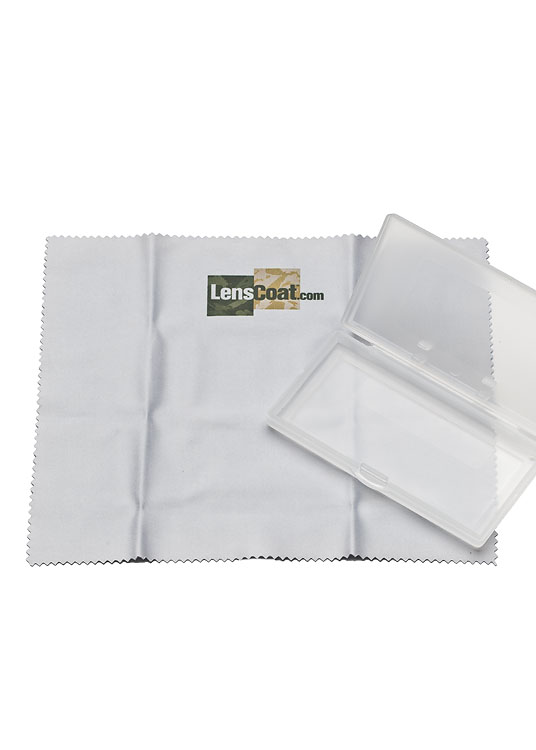
LensCoat® Micro Fiber cleaning cloth High quality Micro Fiber cleaning cloth.
Honestly, havent seen much difference in this than most other high quality microfiber cloths. It is a lit cheaper than most though, which is great. It also comes in a rigid plastic case, which will help keep it clean and dry.
Great for cleaning Camera lenses, LCD screens, Telescopes and Binoculars, Eyeglasses, Mobile phone, CDs, Electronic appliance, Jewelry, Crystal and much more.

I absolutely love every one of these products and I know you will too! Feel free to leave your thoughts on these products. :)
You can find all these products, and much more at LensCoat.com.
LensCoat makes products for Canon and Nikon products, they also make custom products.
This company makes some really cool products. I definitely recommend you go check them out!

I wanna send huge thanks to Scott! And everybody over at Lenscoat!
Disclaimer: Photos are from LensCoat.com. The products in this review was provided to me for the purpose of writing a review. This in no way effects the quality of the review provided. All opinions are my own. No monetary exchange occurred in exchange for this post or review. The views expressed in this review are strictly my own opinions. All reviews provided here are the work of myself and remain completely unbiased.

Thursday, October 18, 2012

Heavy Leather Review

I was SO excited when I got these in the mail!
By far the coolest camera straps Ive ever seen!

Heavy Leather NYC was founded by Rachael Becker in the spring of 2008. Combining her love of leather and heavy metal, she began accessorizing bands across the world with her 'guitar armor'. They make some badass guitar straps, but they also make a few (really cool) camera straps. (as well as belts and wallets) Handmade from the best USA brand leather, theyre unmatched in quality and craftsmanship.
HEAVY LEATHER NYC has rocked the shoulders of Lemmy Kilmister/Motorhead, Slash, Judas Priest, Jesse/Eagles of Death Metal, Uli Jon Roth, Testament members Eric Peterson and Greg Christian, Kim Mcauliffe of Girlschool to name a few. The guitar straps have been featured in publications such as Cosmopolitan Magazine, Hails and Horns Magazine and Mass Appeal Magazine.

Rachael sent me some sample camera straps, and I was amazed at how awesome they are. I mean on HeavyLeatherNYC.com they look super cool, but in person, theyre 100 times cooler.

About the Straps:
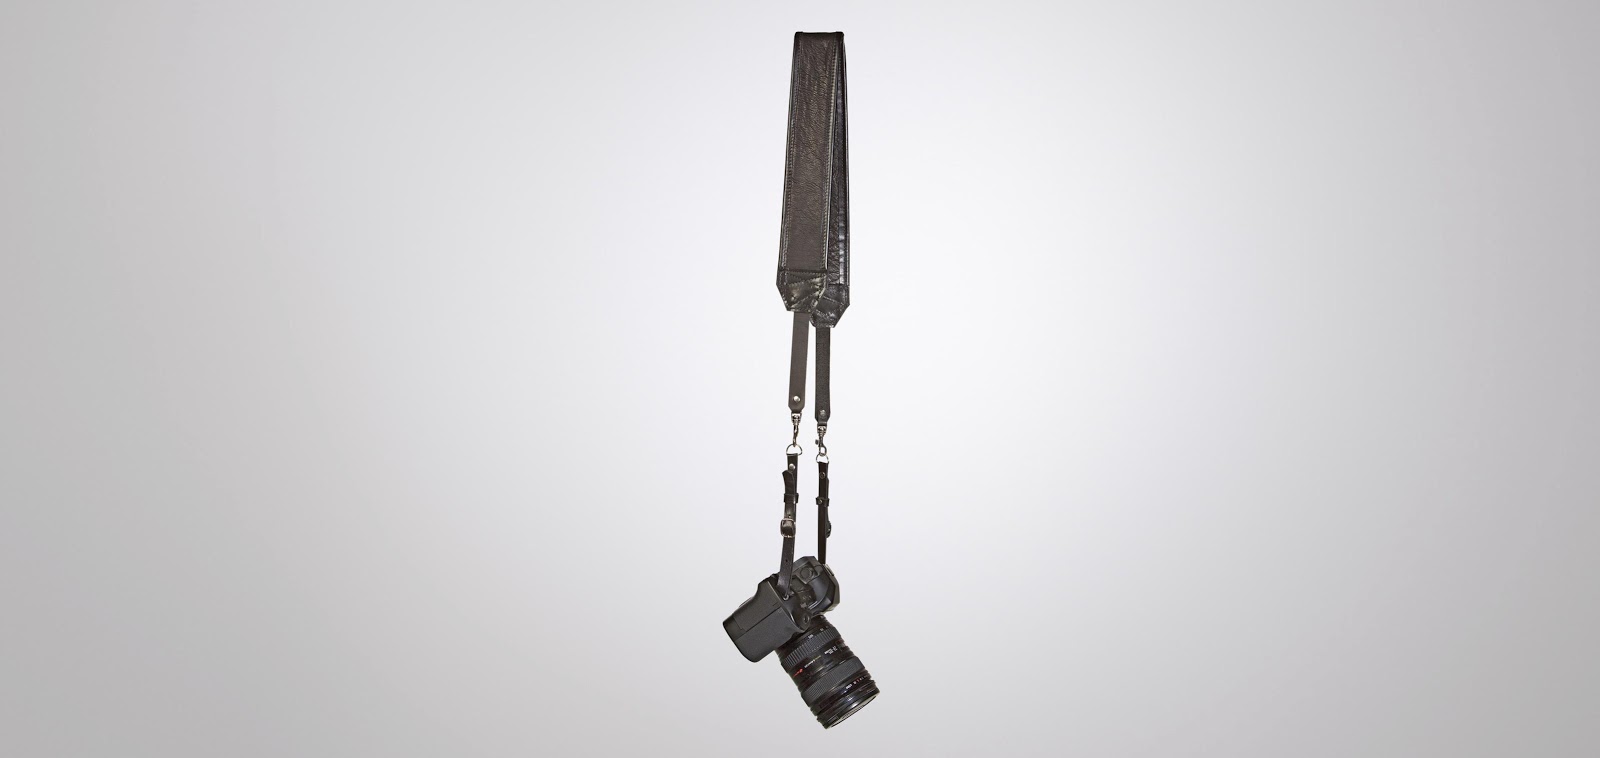
Classic Camera Strap in Pebble White - $95
Classic Camera Strap in Black - $95
The Classic strap length is 46-49" adjustable by leather pieces in the front, made to fit both men and women. The base leather is a 2" double sided soft 3/4 oz buttery cowhide. The sides are bound in leather for smooth comfort around your neck. This style can also be worn on one shoulder slingshot style.
Slingshot Strap in Vintage Brown - $145
The base leather is a soft 3/4 oz cowhide. The shoulder piece is 2 3/4" wide x 15" long and padded with a business card holder towards the back. The buckle sits flat, centered on the shoulder pad. The strap is 1" wide, length is 45-51". There is a snap in the back of the strap to lock your camera in place when not in use. The strap attaches to the camera with a quick release swivel snap. This strap is for the pros- built to last!

My thoughts:
Since these straps are leather, theyre about a thousand times more comfortable than the strap that comes with your camera. Not to mention a thousand times better looking. And since theyre leather, theyll of course break in and become even more comfortable. 

I put the black one on my camera to feel it out. I LOVED how it felt. It was the perfect length (its also adjustable, so if you want it a little longer or shorter, you can do adjust it accordingly; or if you need to you could always add more holes to fit your needs)
They attach to your camera like your original strap attaches, but they also have little clips, for quick release, or if you own more than one you can switch them out really easily.

The sling strap attaches a little differently, and has key rings you put on that the clips attach to. I tried on the sling for a minute, and it seemed really comfortable. It was padded a little, which is really nice. The snap is pretty cool for when your cameras not in use, it kind of keeps it out of the way. 

All in all, I love these straps; and although theyre a bit pricy, I can definitely see myself buying them in the future. 

Go here to find out more about Heavy Leather NYC.
You can also find Heavy Leather straps at B&H Photo, Adorama, Amazon, or go here to find more stores.

I wanna send huge thanks to Rachael! And everybody over at Heavy Leather NYC, keep rockin!
Disclaimer: Photos are from HeavyLeatherNYC.com. The product in this review was provided to me for the purpose of writing a review. This in no way effects the quality of the review provided. All opinions are my own. No monetary exchange occurred in exchange for this post or review. The views expressed in this review are strictly my own opinions. All reviews provided here are the work of myself and remain completely unbiased.

Thursday, October 11, 2012

Keep It Clean: LensPen Review.

Keeping your lens clean is verrrrryyy important. Dust dirt and fingerprints or smudges can degrade your image quality, and even obscure your image. So what I use to keep my lens clean is the LensPen.
"A superb new tool in optical lens cleaning technology.
Perfect for cleaning camera lenses, binocular lenses, small aperture spotting scopes and telescopes, eyepieces, and other optical items. Comes with a handy retractable dust removal brush and a special non-liquid cleaning element, designed to never dry out. Safe and very easy to use."

(text from LensPen.com)


Ive been using the LensPen for a few years now, and in my opinion, it beats all the competition. Everything from microfiber cloths to cleansing sprays. 
The LensPen has a brush at one end, to remove dust and debris. The brush slides out and locks into place. The bristles are very soft, and will not scratch or damage the lens at all. I havent experienced any shedding. At The other end of the pen is a unique non-liquid carbon compound cleaning element. Carbon absorbs oil, so this tip removes fingerprints like nothing else Ive ever used. Inside the cap is a little sponge, which cleans the tip of the pen with just a slight turn of the cap. Since this doesnt use liquid it will never dry out, and will last much longer, since it wont run out of liquid.
You clearly see a fingerprint on the lens, before using LensPen.
No fingerprint or residue, after using LensPen.
You can find LensPen at most camera supply stores. I got mine at Allens Camera, which is right down the street from my house. I got it for $9.99. You might be able to find it as cheap as $6-$7 online. (just be careful of fakes)
I bought a few things off Amazon.com a while back, and it came with a LensPen knockoff, here you can see the differences.
 LensPen is on the left in all images, knockoff is on the right. You can see its shorter. The brush is not as full, and not as soft. The brush actually doesnt lock in place and stay up, you have to hold it up to keep it from going back in when brushing off the lens. The cleaning tip (Im not sure if its made out of the same stuff as LensPen) you can see that its not curves like the LensPen, its slightly smaller, but seems to work basically the same. As with everything, if you buy a knockoff its not going to be as good as the origonal, so buy from a reputable store that sells authentic merchandise.

No matter how many new microfiber cloths come out, no matter how fancy and expensive they are, I will always buy LensPen. (or at least until something truely better comes out) LensPen is extremely affordable and works better than any expensive cleaning cloth or spray Ive ever used.

Hope this review helps. Feel free to leave requests of anything youd like me to review. Thanks for reading. And remember:

Keep on shooting. :)

Disclaimer: All photos are mine, unless otherwise stated. All opinions are my own. No monetary exchange occurred in exchange for this post or review. All items mentioned in this review were purchased by me, for my own personal use, and not for review purposes. I am simply sharing my opinions.